Brands chase shelf impact and then get hit by leaks, scuffs, and packing slowdowns. Those issues usually show up after the first real route, not during sampling.
If I want shelf impact without raising risk, I choose flat vs. die-cut based on route stress, seal window, and handling friction. I protect my seal system first, then I tune COF, fit, and pack-out so the bag still looks clean after transit and stocking.

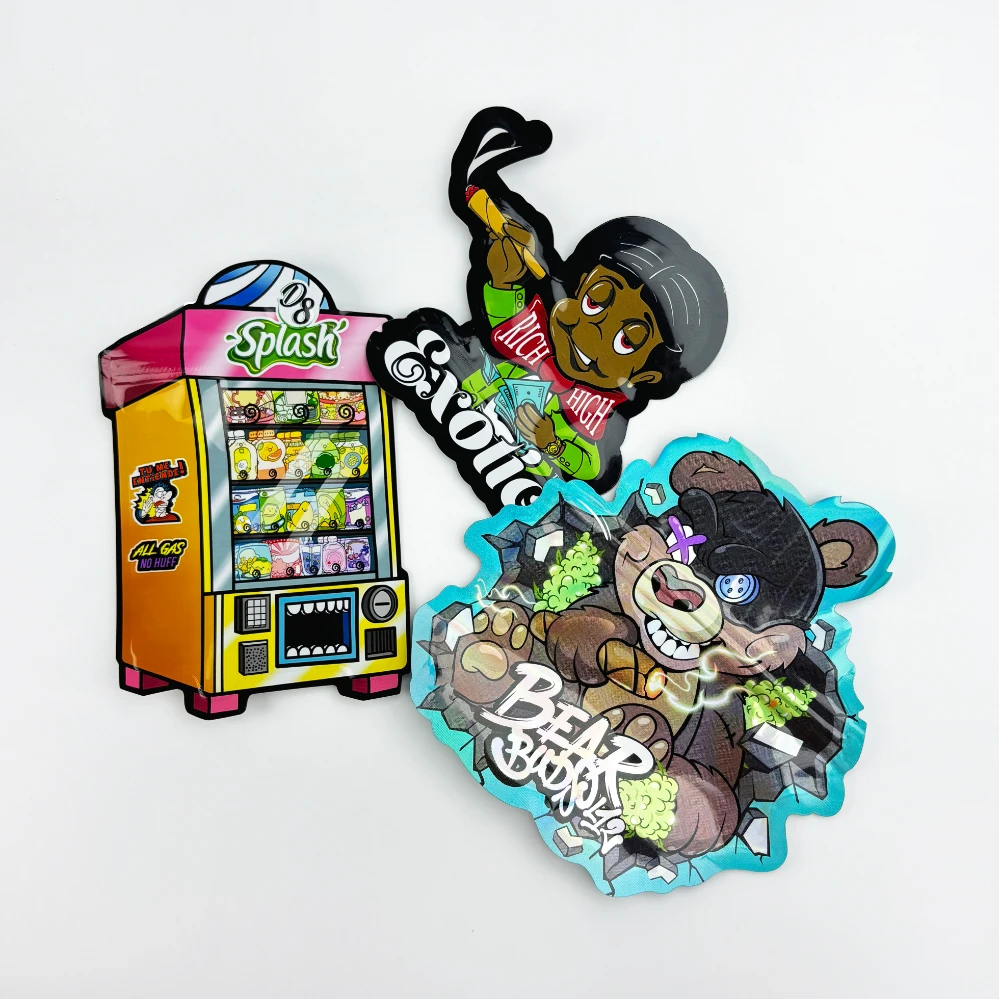
Flat cannabis pouches: I use these when seal stability and packing speed matter most.

I do not treat “shape” as a design trophy. I treat it as a stress multiplier. A shaped bag can win attention fast. A flat pouch can win consistency for every run. So I frame the decision around what customers actually experience: a bag that stays sealed, stays clean-looking, and stays easy to handle from filling to shelf.
Start With Route Stress: Shelf Impact Isn’t Worth It If the Bag Fails in Transit
Shelf impact dies the moment a bag arrives wrinkled, corner-worn, or “used-looking.” That damage often happens before the bag even reaches the store.
I start with route stress because drop, vibration, compression, and thermal cycling stack. They do not just “break bags.” They create ugly, low-trust defects that trigger refunds and rework.
How I spec for the worst path instead of the best photo
I break shelf impact into visibility, pick-up ease, and display stability. Then I test whether the bag can keep that look through route stress. In e-commerce, vibration and repeated small drops create shape memory problems. Corners rub, edges curl, and graphics show scuffs. In retail replenishment, handling abrasion and stacking pressure matter more. A flat pouch usually tolerates stacking and carton compression better because the load spreads across straighter edges. A die-cut bag can concentrate stress at shaped corners and narrow shoulders, which makes cosmetic wear show faster. Thermal cycling can also change how films feel and how zippers behave, which changes perceived quality. I do not choose shape first. I choose the route first. If the bag must survive parcel shipping, I keep the geometry forgiving and I protect the seal window. If the bag mainly lives in controlled retail, I can spend more budget on shape and shelf cues. The point is simple: shelf impact is only real if it survives the channel.
| Route stress |
What it causes |
Most common complaint |
What I control first |
| Drop |
Corner whitening, zipper shock |
“Looks beat up” |
Geometry + pack-out + seal window buffer |
| Vibration |
Scuffing, product dust migration |
“Bag looks dirty” |
COF + fill discipline + inner handling |
| Compression |
Creasing, panel distortion |
“Wrinkled on arrival” |
Carton stacking plan + pouch stiffness balance |
| Shelf handling |
Rub marks, blocking, slow stocking |
“Hard to handle” |
COF target + surface strategy |
Seal System First: How Flat vs. Die-Cut Changes Your Seal Window and Hot Tack Margin
Most brands blame “material” when the real problem is the seal system. If the seal window is tight, every run becomes a gamble.
Flat pouches usually give me a cleaner seal window. Die-cut shapes can steal that window at curves and corners, and they can shrink my hot tack margin.
Why die-cut geometry can narrow the seal window
I define the seal system as the structure, the sealing jaws, and the time/pressure/temperature range that produces stable seals. Flat pouches typically have straighter seal lanes, so pressure distribution stays more even. With die-cut bags, curved shoulders and shaped corners can create uneven contact at the jaw edge. That can reduce effective dwell and leave weak spots that only show up later as micro-leaks. Hot tack matters because the seal must hold while the bag is still hot and the line keeps moving. If the hot tack margin is small, a bag can look sealed and then fail after product settles or after vibration. That is why I treat “it seals” as a low bar. I want “it seals consistently across small process drift.” I also care about zipper placement and how close it sits to the seal zone. If the geometry pushes the zipper too close, the seal becomes more sensitive to contamination and distortion. When I want speed and predictability, I lean flat. When I want shape, I widen the process window with smarter seal lane design and stricter validation.
| Spec lever |
What it affects |
Flat pouch behavior |
Die-cut risk to watch |
| Seal window |
Consistency across runs |
More uniform lane |
Uneven pressure at curves |
| Hot tack margin |
Hold strength while hot |
More forgiving |
Narrower margin if geometry is tight |
| Zipper placement |
Seal sensitivity |
Easier isolation |
Closer to seal zone at shoulders |

The Real Failure Modes: Micro-Leaks, Seal Contamination, and Edge Curl at Shaped Corners
Most failures are not dramatic tears. They are small, repeatable defects that create odor leaks, stale product, and angry reviews.
I watch micro-leaks, seal contamination, and edge curl because they are common, hard to detect early, and expensive after scale.
How I predict complaints before customers write them
Micro-leaks are the silent killer in cannabis packaging. A bag can look fine and still leak aroma or let moisture in, which changes product texture and experience. With shaped bags, risk often rises at corners and transitions where sealing pressure is less even. Edge curl can also create a second problem. Curled edges rub more during transit and shelf handling, so they whiten, scuff, and “age” the bag visually. Seal contamination is another high-frequency issue, especially with powders, kief-like dust, or oily residues from edibles. The more complex the outline, the more likely a bag brushes product during filling, which contaminates the seal lane. Then the brand sees complaints like “smell leaks” or “zipper doesn’t feel secure.” I do not treat those as customer exaggerations. I treat them as process signals. I tighten fill discipline, I increase seal lane protection, and I validate with simple leak checks plus real vibration exposure. If the bag passes a bench test but fails after vibration, I assume micro-leaks are forming under stress.
| Failure mode |
What it looks like |
Why it happens |
What I change first |
| Micro-leaks |
Odor loss, moisture gain |
Weak spots in seal lane |
Seal system window + validation under vibration |
| Seal contamination |
Seal looks cloudy or uneven |
Dust/oil in seal zone |
Fill controls + seal lane isolation |
| Edge curl |
Whitening, scuff lines |
Geometry stress at corners |
Die-cut profile tuning + handling strategy |
COF and Handling: Why “Looks Premium” Can Turn Into Scuffs, Blocking, and Slow Packing
COF is boring until your line slows down. Then it becomes the most expensive “small detail” in the project.
I manage COF so the bag feeds cleanly, stacks well, and stays looking new. If COF is wrong, shaped bags can block, scuff, and create downtime.
How I balance COF for speed, cleanliness, and shelf feel
I treat COF as a control knob for both operations and appearance. A bag that is too high-friction can stick to other bags, which creates blocking and slows pick-and-place. A bag that is too low-friction can slide too easily, which increases scuffing during transit and shelf handling. Flat pouches usually stack more predictably because their edges align. Die-cut bags can interlock, snag, or misfeed because the outline is not uniform. That can force more manual handling, which adds fingerprints and rub marks. I also watch scuffs on shaped outer edges because that is where contact concentrates. This is where brands get surprised. They invest in a bold silhouette and then lose the premium look because the outline shows wear first. I do not solve this by promising “no scuffs.” I solve it by setting COF targets that match the filling method and the pack-out method, then I simulate handling. If the bag looks premium but packs slow, shelf impact is not a win. It is just a new kind of cost per run.
| COF/handling issue |
Operational symptom |
Visual symptom |
My first fix |
| Blocking |
Bags stick, slow feeding |
Rub marks from forcing separation |
COF target + stacking method |
| Outline snag |
Misfeeds, manual rework |
Edge scuffs, whitening |
Die-cut profile + handling points |
| Slow packing |
Downtime, extra labor |
More touch wear |
Match bag geometry to process |
Fit & Fill Reality: Headspace, Product Movement, and How Shaped Bags Create Hidden Waste
Some shaped bags look fuller on shelf, but they can create hidden waste during filling and after shipping.
I judge fit by three outcomes: fill stays clean, seals stay stable, and the bag still looks good after vibration and handling.
What “fit” means when I plan for real filling and real transit
I define fit as the relationship between product behavior and the bag’s working zones. Headspace is part of that. If the bag looks full but the product sits too high, the seal zone gets contaminated and the seal system loses stability. Shaped corners can also change how product flows and piles. In some outlines, product collects in corners during vibration, and that changes the bag’s appearance and the stress on seals. This is why “it looks great on shelf” is not enough. I ask: does it still look great after a real route? Flat pouches often give me more predictable fill and more predictable headspace because the geometry is uniform. With die-cut bags, I watch for areas where product can wedge and where the outline can deform. That deformation can make the bag look wrinkled or uneven, which hurts shelf impact. I also treat hidden waste as a performance issue. If the shape forces slower filling, more rejects, or more cleaning, the total cost per run climbs fast. I prefer shape only when the process and the route can support it.

| Fit risk |
What it creates |
Flat pouch advantage |
Die-cut control needed |
| Headspace drift |
Seal contamination risk |
More predictable fill height |
Stricter fill discipline |
| Product movement |
Wrinkles, ugly settling |
Uniform panel behavior |
Outline tuned for flow |
| Corner pile-up |
Seal stress, uneven look |
Lower corner concentration |
Corner design + pack-out |
A Practical Spec Checklist: What I Send for Quoting + Tests Before a Full Run
A bag that looks good in a sample photo can still fail when the first batch hits real filling and real transit.
I send a checklist that protects the seal window, controls COF, and validates micro-leak risk under route stress before I scale.
The spec items I require to reduce surprises per batch
I keep the checklist simple and executable. First, I define the seal window in real numbers and I protect it from zipper placement and from shaped transitions. Next, I define the seal system targets as ranges, not one magic setting, because every run has drift. Then I set COF targets that match how the bags feed, stack, and ship. I also set barrier targets (OTR/WVTR) based on product sensitivity, not marketing claims. Then I validate with tests that reflect reality: drop, vibration, compression, and a leak check after stress. I do not rely on one “perfect sample.” I pull samples across the run and I compare variability. This is where I prevent scale pain. If a die-cut bag steals seal window or slows packing, I either redesign the outline or I shift to flat for stability. My goal is not to avoid every defect. My goal is to reduce risk, predict complaints, and lock in performance that repeats per run.
| Checklist item |
Why it matters |
How I define it |
Validation |
| Seal window |
Controls leak sensitivity |
Minimum clean seal lane + straight segment requirement |
Seal strength + post-vibration leak check |
| Hot tack margin |
Holds seal while hot |
Stable range across process drift |
Line-speed simulation and handling |
| COF target |
Controls feed and scuff |
Match to packing and stacking |
Blocking check + handling abrasion grading |
| OTR/WVTR target |
Protects freshness |
Set by product need |
Supplier data + practical storage observation |
Die-cut weed mylar bags: I recommend these when you can protect seal window and control handling wear.

When I Choose Flat, When I Choose Die-Cut: Shelf Impact Without Raising Risk
Shape can win the first glance. Stability wins repeat orders.
I choose flat when the route is harsh and packing speed matters. I choose die-cut when the display is controlled and the outline does not steal seal window.
My rule: if shape steals seal window or slows packing, it is not worth the risk
I choose flat pouches when I need consistency per batch, fast packing, and lower cosmetic wear. Flat bags usually feed better, stack better, and keep seals more stable because the geometry is simple. I choose die-cut when a brand needs a strong shelf signal and the channel can support it. That means I can maintain a clean seal zone, I can control contamination, and I can validate that edge curl and scuffing stay within an acceptable range. I also consider the total cost per run. If the shaped outline adds labor, downtime, or reject rate, it can erase the value of shelf impact. So I treat die-cut as a structured choice, not a style choice. If I can protect the seal system and keep handling smooth, die-cut can be a great tool. If I cannot, I go flat and I let design win through layout, print strategy, and consistent “arrive looking new” performance.
| I choose… |
When the channel looks like |
What I protect first |
What I validate |
| Flat pouches |
Parcel shipping, high handling, fast packing |
Seal stability + COF for feeding |
Micro-leaks after vibration + scuff after handling |
| Die-cut bags |
Controlled retail, strong display needs |
Seal window + edge wear control |
Edge curl, blocking, cosmetic grade after transit |
Conclusion
I get shelf impact without raising risk by protecting seal window first, then tuning COF, fit, and validation to match the route.
Explore Flat Cannabis Pouches
Explore Die-Cut Weed Mylar Bags
FAQ
Do die-cut cannabis mylar bags leak more than flat pouches?
Not automatically, but they can be more sensitive. If the shape reduces seal window or creates uneven sealing pressure, micro-leaks become more likely. I validate under vibration, not just on the bench.
What improves shelf impact without raising complaint risk?
I focus on stable seals, controlled COF for clean handling, and an outline that does not create edge curl or high-visibility scuffs. Shelf impact must survive the route.
What is the most common cause of odor or “smell leaks” complaints?
I usually see micro-leaks from narrow seal windows or seal contamination during filling. I fix it with seal system ranges, cleaner seal zones, and post-stress leak checks.
Why do shaped bags scuff or whiten at the edges?
Shaped corners concentrate contact during transit and shelf handling. That creates abrasion lines and whitening. I tune the outline and handling strategy to reduce visible wear.
How do I decide flat vs die-cut for my next run?
I choose flat when packing speed and route stress are high. I choose die-cut when display control is strong and the shape does not steal seal window or create blocking.
About Me
Jinyi — From Film to Finished—Done Right.
Website: https://jinyipackage.com/
Our mission: I run a source factory for flexible packaging. I deliver packaging plans that are reliable, usable, and practical. I focus on stable quality, clear lead times, and structures that match how products move through real channels.
About me: I work on custom packaging solutions across food, snacks, pet food, and personal care. I supply stand-up pouches, zipper bags, foil laminate bags, boxes, cups, labels, and more. I position JINYI as a one-stop factory from materials to finished packs, and I care most about control and consistency so reorders stay stable.