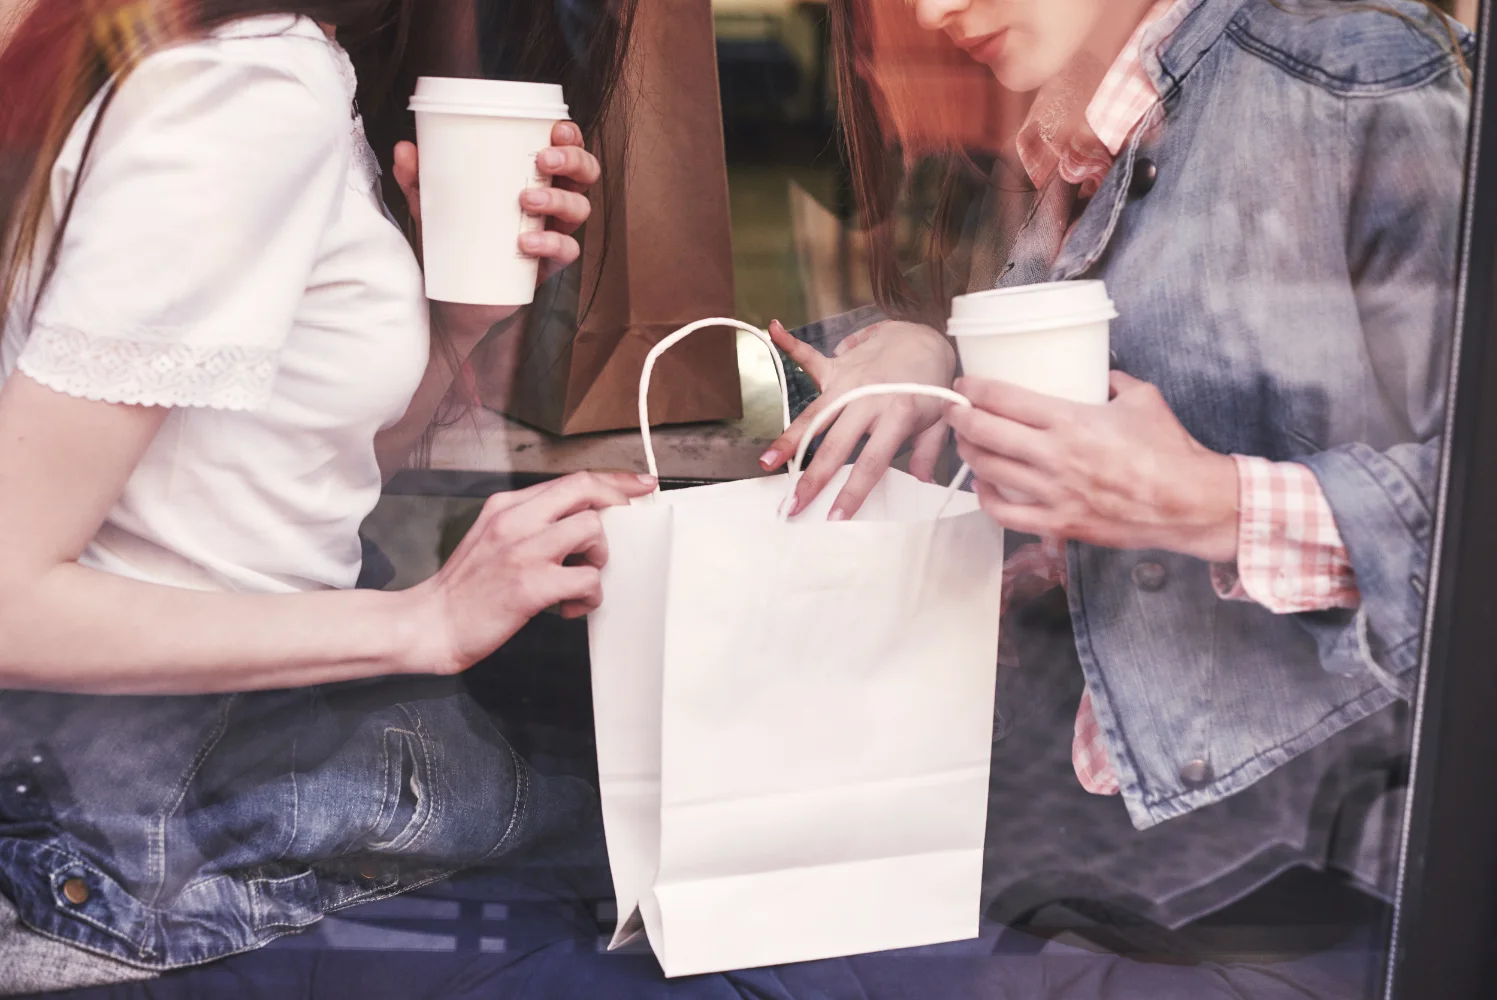
If your coffee bags tear or tip in delivery, your brand pays twice—refunds and bad reviews. The fix is not “thicker paper.” It is load control, bottom design, and pack-out rules.
I stop blowouts and tip-overs by treating the bag as a system: bottom structure + geometry + moisture behavior + cup containment + route stress validation. I lock failure modes first, then I set specs and tests that still hold after real delivery abuse.

When coffee takeaway bags fail, the bag is usually blamed. I do the opposite. I map the load, the moisture, and the route stress first. Then I make the bag behave like a controlled carrier, not a printed container.
Talk to Jinyi about coffee takeaway bags that survive delivery
What do “bottom blowouts, tip-overs, and cup movement” really look like in the market?
It looks fine at pickup, then fails mid-route. Customers see a wet bag, a tilted cup, and a stained car seat. I treat these as different failures with different triggers.
I separate bottom blowouts, tip-overs, and internal movement into measurable failure modes, then I tie each complaint to a location and a stress trigger.

I never start with “your bag is weak.” I start with failure naming. A bottom blowout is often a base-glue or corner-stress event. A tip-over is usually a geometry and center-of-gravity problem. Cup movement is friction plus headspace plus route vibration. From a production standpoint, this matters because you cannot control what you do not measure.
How I translate complaints into controllable signals
| Customer complaint |
Most likely failure mode |
Where it starts |
What I measure |
| “The bag bottom opened” |
Bottom blowout / glue drift |
Base gusset corners, glue overlap |
Peel trend, wet-strength drift, corner crack trend |
| “Cup tipped and spilled” |
High CG + unstable geometry |
Bag width/depth mismatch, large headspace |
Tilt margin, movement distance, stability in carrier |
| “Cup moved and rubbed a hole” |
Internal abrasion / rub point |
Cup rim edges, hard add-ons, carton contact |
COF drift, scuff dust, rub-point map after vibration |
Why do coffee takeaway orders create unstable loads?
One order is one hot cup. The next is two iced cups plus snacks. The load changes fast and the center of gravity rises. Most bags are not designed for that swing.
I treat coffee takeaway as “wet + hot/cold + weight swing.” If I do not control headspace and containment, tip-overs become predictable.
I see the same pattern in real delivery. Hot cups soften paper over time. Iced cups add condensation and surface moisture. Mixed orders add hard corners and shifting weight. In real manufacturing, this detail often determines whether a design that looks fine in a showroom survives the route. I lock an order profile first: typical cup count, max weight, ice/hot mix ratio, and expected dwell time. Then I design bag geometry and pack-out around that profile, not around a single “ideal” order.
What I ask before I quote a bag
| Question |
Why it matters |
What it changes |
| Hot only, iced only, or mixed? |
Moisture and stiffness drift |
Paper type, wet strength, glue choice |
| Typical cup count + maximum cup count? |
Weight and CG shift |
Bottom reinforcement, handle system |
| Do you use a cup carrier? |
Containment controls movement |
Bag width/depth, headspace targets |
| Average delivery time? |
Dwell time drives softening |
Coating, glue zones, QC targets |
How do I prevent blowouts at the base with gussets, glue zones, and reinforcement?
Bottom blowouts are not random. They happen where load and moisture meet weak glue zones and sharp fold stress. I design the base like a load-bearing joint.
I stabilize the bottom system by controlling gusset geometry, glue coverage, corner stress, and wet-strength drift—because the base is where failures start.
I start with the base because it carries everything. A cup bottom creates point load. A snack box creates a hard edge. Moisture lowers stiffness. Then route vibration repeats the stress cycle. From our daily packaging work, we see that a small change in glue coverage or compression time can swing real-world performance more than a big GSM increase. I set minimum glue overlap, define reinforcement zones, and control the corner fold radius to reduce crack initiation. I also treat wet exposure as a design condition, not an accident.
Bottom blowout control plan
| Risk driver |
What fails |
My control lever |
QC signal |
| Point load from cup base |
Corner split / base tear |
Reinforcement patch or thicker base zone |
Corner crack trend after compression |
| Moisture + dwell |
Glue strength drop |
Glue zone width + press time + wet-strength paper |
Peel trend after humidity exposure |
| Vibration |
Fatigue tear growth |
Fold radius control + gusset stability |
Micro-tear growth after vibration |
Why can “bigger bags” make tip-overs worse?
Bigger adds empty space. Empty space creates movement. Movement raises tip risk. Many brands increase bag size and accidentally reduce stability.
I control tip-overs with geometry rules: width/depth ratio, gusset depth, and controlled headspace—not with “extra room.”
Tip-over is a physics problem. If the bag is too wide, the cups can separate and shift. If the gusset is too deep, the load can rock. If headspace is too large, the cups gain momentum during braking. In real manufacturing, this detail often determines whether a bag that looks premium becomes a delivery headache. I set geometry targets based on the cup carrier footprint and the most common order mix. I also design for “ovalization” under squeeze, because delivery drivers compress bags in backpacks and carriers.
My geometry rules that improve stability
| Design choice |
What it improves |
What can still fail |
| Match bag width to carrier footprint |
Stops lateral shifting |
Tip risk if headspace stays large |
| Controlled gusset depth |
Reduces rocking under braking |
Base tear if bottom reinforcement is weak |
| Headspace limit rule |
Reduces momentum and cup swing |
Lid pop-off if cups are squeezed too tight |
Get a geometry + pack-out spec for your coffee takeaway bags
How do I stop cup movement with carriers, dividers, friction, and headspace control?
Most spills start as movement. The cup shifts, hits a corner, and tilts. If I stop movement, I prevent both tip-overs and bottom damage.
I treat cup containment as a system: carrier/divider + friction control + headspace limits. If the cup cannot gain momentum, the bag survives.
I do not rely on paper strength alone. I design the inside behavior. A cup carrier locks the base and reduces rocking. Dividers stop cup-to-cup collisions. Friction (COF) decides whether the carrier slides on the bag floor. Headspace decides whether cups can accelerate. From our daily packaging work, we see that a “strong bag” still fails when the load is allowed to move. I set pack-out rules that specify carrier type, cup placement, and maximum mixed-item combinations. If a brand wants to put cookies or a hard box inside, I add a buffer zone so the hard edge cannot create a rub point during vibration.
Cup containment choices vs failure risks
| Containment method |
Main benefit |
Main risk |
What I test |
| 4-cup carrier |
Locks bases, reduces tip |
Oval squeeze in delivery |
Compression + braking simulation |
| Divider insert |
Stops collisions |
Added height increases CG |
Tip margin under vibration |
| High-friction floor |
Reduces sliding |
Scuff dust affects surfaces |
COF drift after humidity |
How do condensation and hot vapor weaken paper and adhesive bonds over time?
The bag can pass a dry test and still fail on route. Moisture and heat change stiffness, glue strength, and tear behavior. Time makes it worse.
I design for wet + hot/cold dwell time. If paper and glue drift under moisture, the bag will fail even with high GSM.
I treat coffee delivery as a moisture cycle. Hot drinks add vapor. Iced drinks add liquid water through condensation. That moisture travels into paper fibers and reduces compression strength. Adhesive bonds also drift when they absorb moisture or soften under heat. From a production standpoint, this matters because your factory QC might be dry and fast, while your delivery environment is wet and long. I choose paper with wet-strength stability, control coating behavior, and protect glue zones from direct condensation contact when possible. I also set a “time-to-failure” test window so I can see if performance collapses after 20–40 minutes, which is where many brands get surprised.
Moisture-driven failure map
| Moisture source |
What it weakens |
Common failure |
My control point |
| Hot vapor |
Rim zones + glue areas |
Handle peel or side tear |
Glue coverage + press time + zone design |
| Iced condensation |
Bottom stiffness |
Bottom sag, corner crack |
Wet-strength paper + base reinforcement |
| Mixed orders |
Local rub points |
Puncture/tear growth |
Pack-out buffer and divider rules |
Where do tear paths start when the load shifts during delivery?
The bag tears where force concentrates. That is usually the handle root, sidewall opening, or a stressed fold corner. Load shift turns small defects into large tears.
I prevent tearing by controlling handle construction, glue zones, reinforcement, and fiber direction—because delivery forces are not vertical and steady.
Many people assume the handle only sees a clean vertical force. Delivery adds diagonal force from braking and cornering. That creates shear at the handle root and sidewall. In real manufacturing, this detail often determines whether handles peel off or the paper tears around the handle hole. I specify handle type (twisted vs flat), define minimum glue coverage, and add reinforcement where the tear path begins. I also pay attention to paper grain direction because tear resistance is directional. If grain direction fights the main stress path, you can get a clean rip even on a thick bag.
Handle + sidewall risk controls
| Failure |
Where it starts |
Why it happens |
My fix |
| Handle peel |
Glue zone edge |
Moisture + short press time |
Wider glue zone + controlled press |
| Handle root tear |
Handle hole corners |
Stress concentration under braking |
Reinforcement patch + radius control |
| Sidewall split |
Top opening / fold lines |
Load shift + paper drift |
Fiber direction match + fold radius stability |
How do compression, vibration, and braking “train” failures over the route?
Delivery stress is not one big hit. It is repeated small loads that grow damage. That is why bags fail after a few stops, not at pickup.
I map route stress as a timeline. Compression makes deformation. Vibration creates micro-slip. Braking creates load spikes. The combo trains tears and tip-overs.

From our daily packaging work, we see fatigue patterns that look identical across cities. Bags get squeezed in backpacks and totes. Cups rock under vibration. Then braking shifts the load and pulls the handle diagonally. Thermal cycling adds stiffness drift. That is why I do not accept “it passed a lift test.” A lift test is one moment. Delivery is many moments. I build the spec around repeated abuse and I validate with stacked stresses, not isolated tests.
Route stress timeline vs outcomes
| Route event |
Primary stress |
What it triggers |
What I inspect after |
| Bag squeezed in carrier |
Compression |
Oval deformation, bottom sag |
Base corner crack trend, stability check |
| Riding on rough roads |
Vibration |
Micro-slip, rub point growth |
Movement distance, scuff dust, tear initiation |
| Braking / turns |
Load spike + shear |
Tip-over, handle tear |
Handle root strain, tilt margin |
What stress-first validation tests do I run before mass production?
I do not validate an empty bag. I validate the real system: bag + load + carrier. I apply stress first, then I check drift.
My validation unit is “bag + real load + carrier/carton.” I run compression/vibration/moisture exposure first, then I measure tear trends and tip-over risk.
I use a stress-first sequence because it forces slow failures to show up early. I load the bag with real cup configurations: hot cup, iced cup, mixed order, and common add-ons. Then I apply stacking load and compression to mimic backpacks and totes. I add vibration to mimic driving. I add moisture exposure to mimic condensation. Then I inspect: bottom glue zone lift, corner crack growth, handle peel trend, and cup movement distance. In real manufacturing, this detail often determines whether you scale with confidence or keep getting “random” returns.
My checklist before I approve a run
| Test |
What it simulates |
Pass signal |
| Stack load + squeeze cycles |
Backpack/tote compression |
No base crack trend, stable shape |
| Vibration exposure |
Road vibration |
Movement distance stays within target |
| Moisture/condensation dwell |
Iced coffee reality |
No glue drift, no bottom soft collapse |
| Braking/tilt simulation |
Turns and stops |
No tip-over at defined tilt angle |
Which Baseline, Upgrade, and Premium coffee bag specs do I shortlist fast?
Not every brand needs the same build. I offer 2–3 packages based on load profile and delivery abuse. I also call out what can still fail.
Baseline stabilizes the bottom and handle for normal delivery. Upgrade targets condensation and mixed orders. Premium locks pack-out rules, QC gates, and change-control so scale stays stable.
I shortlist packages using risk statements, not marketing claims. Baseline focuses on the bottom system and handle attachment, because those are the most common failure starts. Upgrade adds wet-strength stability and reinforcement where condensation and point loads hit hardest. Premium adds tighter process control, lot-to-lot monitoring, and clear pack-out rules so store teams do not overload or misplace cups. From a production standpoint, this matters because a design that survives testing can still fail when stores change packing habits or when paper lots drift. I write the rules and QC checkpoints so performance does not depend on “operator feel.”
Spec packages and what can still fail
| Package |
Best for |
Main protections |
What can still fail |
| Baseline |
Short routes, standard loads |
Stable base + handle glue control |
Tip risk if headspace is large |
| Upgrade |
Condensation + mixed orders |
Wet-strength stability + reinforcement zones |
Movement if carrier is missing |
| Premium |
High-volume delivery brands |
Validation + QC gates + pack-out rules |
Failures if stores overload beyond spec |
Conclusion
I stop coffee takeaway bag failures by controlling load, geometry, moisture drift, and pack-out rules—then validating under real route stress. If you want a spec that scales, talk to me.
Talk to Jinyi About Coffee Takeaway Bags That Survive Delivery
FAQ
1) What causes coffee bag bottom blowouts most often?
It is usually base corner stress plus glue zone drift under moisture, not GSM alone.
2) Why do cups tip over even when the bag looks strong?
Tip-overs are driven by center-of-gravity height, headspace, and movement under braking and vibration.
3) Do I need a cup carrier inside the bag?
If you deliver multiple cups or mixed hot/iced orders, a carrier is the fastest way to reduce movement and tip risk.
4) How do you test bags for real delivery abuse?
I use stress-first validation: compression/stack load + vibration + moisture exposure first, then I inspect drift and failures.
5) What should I provide to get the right spec fast?
I need typical cup count, hot/iced mix, average delivery time, whether you use carriers, and your most common add-ons.