I see skincare gift sets arrive with the same ugly surprises: bottles clashing, pumps snapping, caps loosening, and leaks turning one bad unit into a full-box mess.
I stop these failures by choosing inserts by failure mode, not by “premium feel.” I treat each bottle as a moving load, remove its degrees of freedom, and lock material behavior, tolerance, and pack-out rules in the spec.
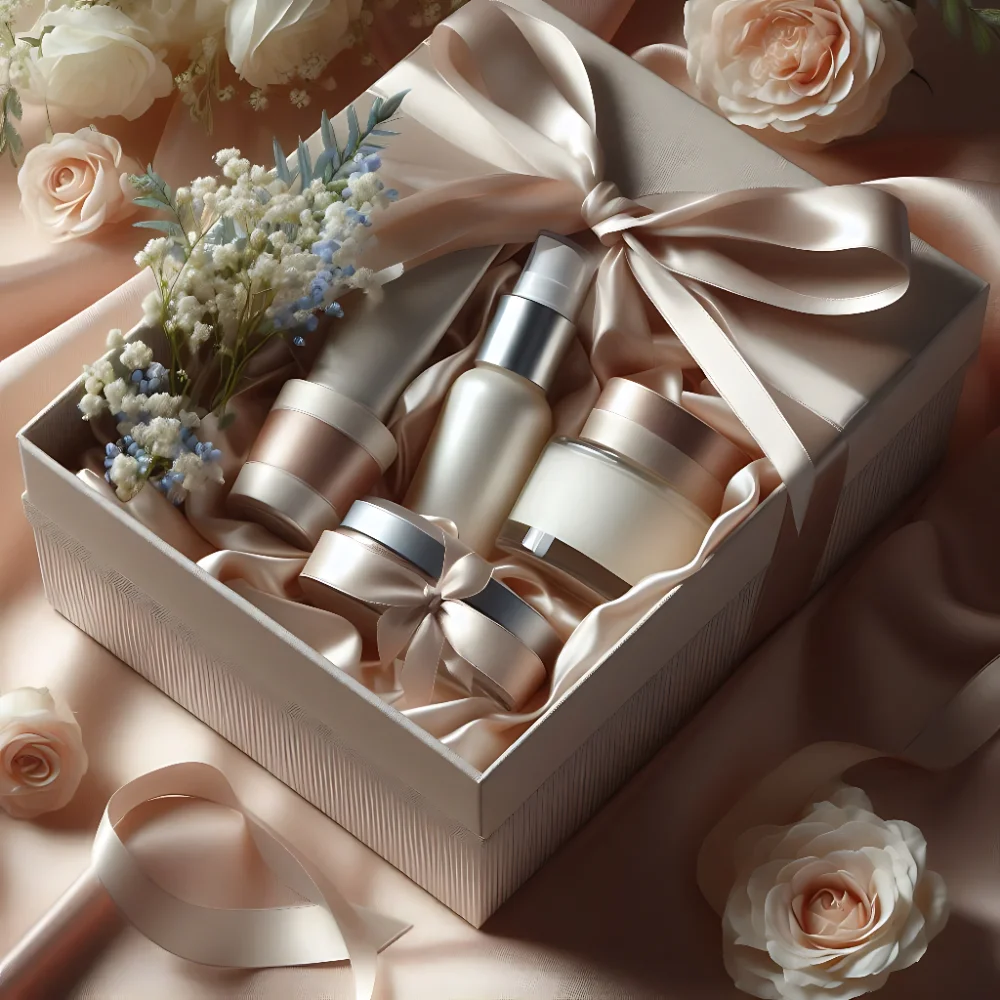
See a rigid flip-top gift box style where insert stability decides shipping outcomes

I do not start with “foam is safer” or “paperboard is cheaper.” I start with what actually fails in transit, then I pick the insert material and geometry that survives vibration, occasional drops, and long stack compression without drifting out of spec.
Define the Real Failures First: Bottle Clash, Cap Loosen, Pump Break, or Cosmetic Leak Spread?
When a client says, “The set got damaged,” I do not accept that as a useful description. I need to know which failure happened, because each one needs a different insert strategy.
I split transit failures into four buckets: bottle clash, cap or pump loosen, pump break, and leak spread. I then map each bottle type to the risk it creates inside the set.
My failure map for skincare sets
| Failure |
What it looks like |
Common trigger |
What I control first |
| Bottle clash |
Scuffs, chips, label damage, glass-to-glass hits |
Side movement in vibration |
Side constraints + separators + no shared free space |
| Cap/pump loosen |
Weeping leaks, cap backing off, pump collar loosens |
Torque from slosh + repeated vibration |
Anti-rotation features + upright control + headspace control |
| Pump break |
Broken actuator, snapped pump head, bent dip tube |
Point loads during drops and stacking |
Pump clearance pocket + top restraint + shock path design |
| Leak spread |
One leak ruins labels, papers, and the whole set |
Fluid migration across the tray |
Compartment isolation + absorb/contain zones + secondary wrap |
From a production standpoint, this matters because I cannot “upgrade the insert” without knowing what I am upgrading against. In real manufacturing, this detail often determines whether the first sample looks fine but the first shipment fails. Glass bottles need anti-clash separation and point-load control. Pump bottles need top protection and anti-rotation. Dropper bottles often leak at threads under vibration, so they need containment strategy even when they look sealed. If I classify the failure first, I can design a tray that prevents the exact motion that creates the complaint, instead of buying a thicker material and hoping it works.
Start With the Product as a Load: Why Weight, CG, and “Liquid Slosh” Decide Insert Strategy?
I treat every bottle as a moving load, not as a static object. A bottle that “fits” on a desk can still move in shipping because acceleration makes it behave heavier.
I build insert strategy from weight, center of gravity, bottle height, base stability, and liquid slosh. I remove motion paths that create torque and creep.
Load factors I request before I lock an insert
| Load factor |
Why it matters |
What I change in the insert |
| Weight |
Heavier bottles generate higher impact energy |
Deeper pockets + stronger side constraints |
| Center of gravity (CG) |
High CG tips and rotates easily |
Upright locks + anti-rotation keys |
| Liquid slosh |
Slosh creates torque and loosens caps |
Headspace control + collar support + tilt prevention |
| Base stability |
Small bases wander and rattle |
Base nests + side walls + no free travel |
From our daily packaging work, we see “random” rattles that are actually a predictable creep problem. In real manufacturing, this detail often determines whether your tray holds after a week in a warehouse and then a week in transit. If the bottle can travel even a few millimeters, vibration will repeat that travel thousands of times and the bottle will slowly walk into a bad position. That walking can loosen caps, expose pumps to point loads, and create label scuffing. I therefore design for controlled clearance: bottles must insert smoothly and remove easily, but they must not have a usable travel path in transit. I do not want “tight.” I want “no degrees of freedom.”
Foam Isn’t “Safe by Default”: Compression Set, Aging Drift, and the Loose-After-7-Days Problem?
Foam feels safe because it is soft. I still treat foam as risky if the set will be stacked, stored, or shipped long distances.
Foam’s hidden weakness is compression set. A tray that holds tightly on day one can loosen after aging or stacking pressure, and then the set starts to rattle.
What I watch when I use foam
| Foam behavior |
What it causes |
How I mitigate it |
| Compression set (aging drift) |
Rattle appears after storage |
Lock compression ratio + require aging check |
| Soft edges deform |
Bottles tilt and creep |
Add geometry walls or hybrid support |
| Particle shedding (some foams) |
Dirty look and surface marks |
Specify surface finish and cleanliness standard |
From a production standpoint, this matters because foam can lie in the sample stage. In real manufacturing, this detail often determines whether the customer feels “luxury” or “cheap” when the box arrives. I have seen foam trays that feel perfect in hand, then loosen after being compressed in cartons. The bottles do not break, but the set rattles, and that rattling kills the premium perception. If I choose foam, I write the time dimension into the spec. I lock the target compression, I ask for an aging or stack simulation, and I design the pocket geometry to reduce reliance on foam rebound alone. I also check whether foam contact will mark matte bottles or printed decorations. Soft does not automatically mean safe.

EVA Is Stable but Can Scuff: When Friction, Hard Edges, and Tolerance Make It Worse?
EVA is my go-to when I need repeatable geometry. EVA holds shape well and stays consistent across production runs.
EVA can still create complaints if it is too high-friction, if cut edges act like blades, or if tolerance is not controlled. I treat EVA as stable, not as gentle.
My EVA control checklist
| EVA risk |
What it looks like |
What I lock |
| High friction contact |
Rub marks on glossy or plated parts |
Contact zone material and surface finish |
| Sharp cut edges |
Scuffs, scratches, label slicing |
Edge bevel, radius, and cut quality standard |
| Tight tolerance mismatch |
Hard insertion, torn labels, deformation |
Assembly clearance targets + QC sampling points |
From our daily packaging work, we see EVA succeed when the insert must remain stable after shipping and storage. In real manufacturing, this detail often determines whether the pack-out stays consistent at scale. I still protect bottles from EVA’s “hardness behavior.” If a bottle has a plated cap, EVA contact can leave friction marks. If a bottle has a printed label, a sharp EVA edge can scuff it during insertion. I therefore separate the job into two zones: geometry zones that control motion, and contact zones that protect surfaces. I also control tolerance. EVA is precise, which means it will punish bad drawings. I lock the hole sizes, edge treatment, and acceptable insertion force, because the customer experience matters as much as the shipping survival.
Paperboard Inserts Win on Efficiency: But Tolerance Stack-Up Creates Rattle and Misfit?
Paperboard inserts can look premium and assemble fast. They also support good costs at volume and allow clean structural design.
The main risk is tolerance stack-up. Small variations in board thickness, fold lines, and glue positions can add up and create rattles, tilt, and misfit.
Where paperboard stack-up usually happens
| Stack-up source |
What it causes |
What I do |
| Board thickness drift |
Pockets loosen or bind |
Lock board spec and allow controlled clearance |
| Fold/crease variation |
Geometry shifts and bottles tilt |
Define critical fold dimensions and checkpoints |
| Glue position drift |
Cells deform and rattle |
Glue pattern control + in-process inspection |
From a production standpoint, this matters because paperboard is efficient but sensitive to cumulative error. In real manufacturing, this detail often determines whether one batch feels tight and another batch feels loose. I do not rely on “perfect folds.” I design anti-rattle features that tolerate small variation, like secondary stops and controlled compression points. I also avoid designs where one dimension error affects many cells at once. Paperboard is great when I need a clean structure and fast assembly, but I only recommend it when the factory can hold critical dimensions and when the product surfaces will not be damaged by edge contact. If I need higher stability, I use paperboard as a frame and combine it with a softer contact layer.
Leak Mess Strategy: I Don’t Try to “Prevent All Leaks”—I Contain and Isolate Failure?
Skincare sets often include pumps, droppers, and screw caps. Some leakage risk always exists under pressure, temperature change, and vibration.
I do not only chase “zero leaks.” I build a containment plan so one leak does not ruin the whole set and the outer box.
How I contain leaks inside a gift set
| Leak scenario |
Damage pattern |
My containment move |
| Cap weep |
Liquid spreads across tray |
Separate compartments + drain/absorb zone |
| Pump seep |
Top mess and label damage |
Top clearance + secondary wrap for high-risk items |
| Dropper loosen |
Slow leak that stains everything |
Anti-rotation seating + isolation sleeve |
From our daily packaging work, we see brands lose money not because one bottle leaked, but because the leak spread and destroyed the premium presentation. In real manufacturing, this detail often determines whether a customer asks for a full refund even when the product is still usable. I therefore isolate each SKU. I keep bottles in separate cells. I add an absorb or sacrificial zone where small leaks can be captured without touching printed papers or soft-touch surfaces. I also recommend secondary wrap for the highest-risk items, like droppers and pumps, especially for e-commerce. I treat containment as a product feature, because customers judge the set as one experience.
Route Stress Reality: Vibration + Drop + Stack Compression (Why Glass Sets Need a Different Insert)?
I validate inserts against real route stress, not only a single drop test. Shipping combines repeated vibration, occasional impacts, and long stack compression.
Glass sets need different protection than plastic sets. Glass hates point loads and micro-rubbing. Plastic bottles can deform and loosen closures under compression.
Route stress vs insert response
| Route stress |
What it does |
Insert response I use |
| Vibration |
Rattle, creep, abrasion |
Remove travel paths + isolate contact points |
| Drop/impact |
Point-load breakage and pump snaps |
Shock path design + top restraints |
| Stack compression |
Deformation and cap loosening torque |
Load spread + headspace control + stability checks |
From a production standpoint, this matters because the same insert can pass one drop and still fail after days of vibration. In real manufacturing, this detail often determines whether complaints show up only for certain destinations. Glass bottles can rub and chip even without breaking, which still looks terrible in a premium set. Plastic bottles can survive impacts but deform in stacking, and that deformation can loosen caps and pumps. I therefore tune inserts by material of the product, not only by material of the insert. I also validate the full pack-out: insert, box, carton, and stacking. If the outer carton allows movement, even the best insert will suffer.
Assembly Line Matters: How Packing Speed and Operator Variance Decide Insert Choice?
An insert that is hard to pack will be packed wrong. That is not a worker problem. That is a design problem.
I design inserts to be foolproof. I want fast placement, self-location, and low chance of upside-down or misaligned packing.
My “foolproof” packing rules
| Common packing error |
What it causes |
Design move I use |
| Bottle not seated fully |
Rattle and collision |
Clear stop features and visible seating |
| Wrong orientation |
Pump damage or cap loosen |
Keyed pockets and one-way geometry |
| Insert assembled wrong |
Loose cells and creep |
Simple assembly steps and locking tabs |
From our daily packaging work, we see failure rates climb when packing steps have too many “perfect placements.” In real manufacturing, this detail often determines whether your gift set can scale. Foam can be forgiving but can still be mis-inserted if it has orientation. EVA can be precise but can slow packing if holes are too tight. Paperboard can be efficient but can collapse if tabs are not locked. I therefore design the tray and the packing workflow together. I want an insert that supports speed without increasing risk. I prefer geometry that guides the operator naturally, because consistency is the real luxury in mass production.
My Material Decision Matrix: Which Insert I Choose by Product Type, Risk Level, and Budget?
I do not recommend a single “best” insert material. I recommend the best system for your product mix and route risk.
I usually offer two tiers: a production-safe tier for lower complaint risk, and a display tier for maximum presentation with hidden constraints.
My decision matrix (quick guide)
| Situation |
My default pick |
Why |
What I add |
| Heavy glass + long e-commerce route |
EVA or hybrid (stable + protected contact) |
Stable geometry under vibration |
Isolation sleeves + partitions |
| Mixed pumps/droppers + leak risk |
Paperboard structure + isolation zones |
Compartment control and containment |
Secondary wrap for high-risk SKUs |
| Short route + gifting presentation priority |
Foam (with time controls) |
Soft feel and premium look |
Aging check + anti-rattle geometry |
From a production standpoint, this matters because the “best material” changes with risk. In real manufacturing, this detail often determines whether you can ship globally without redesigning every season. If the route is harsh, I prioritize repeatable geometry and friction control. If the route is gentle and the retail presentation matters most, foam can be a great choice, but only if I control compression set and storage time. If the brand needs efficiency and clean structure, paperboard can win, but only if I design around tolerance stack-up. I always show both tiers so the buyer can choose with eyes open, not with mood-board logic.
Quoting Checklist: What I Need to Spec Inserts So the First Sample Doesn’t Lie?
If you want an insert that ships clean, I need real inputs. I cannot engineer motion control from photos alone.
I quote inserts based on measurable product data, route stress, and acceptable surface risk. That is how I avoid “pretty sample, bad shipment.”
What I request before I design the first insert
| Input |
Why it matters |
What it controls |
| Each bottle L×W×H + weight |
Defines load and pocket geometry |
Clash risk and tilt risk |
| Material (glass/plastic) + surface finish |
Scuff sensitivity |
Contact zone material choice |
| Closure type (cap/pump/dropper) |
Leak and break risk |
Top restraint and containment plan |
| SKU count per set + layout |
Collision paths |
Compartment design |
| Shipping method + carton stack |
Route stress profile |
Validation plan and margins |
| Acceptable rattle/scuff level |
Defines the target |
Material and tolerance decisions |
From our daily packaging work, we see the first sample “lie” when the inputs are incomplete. In real manufacturing, this detail often determines whether the insert works only for one batch of bottles. If bottle suppliers change diameter slightly, paperboard stack-up can create rattle. If a pump head changes shape, EVA can become too tight. If the route changes to e-commerce, foam can drift under stacking. I therefore lock a quoting checklist and I build in reasonable margin. I want the insert to be stable against the normal variation that will happen in supply chains. That is how I keep the gift set premium after transit, not only in the studio.
Conclusion
I stop clash, leaks, and rattle by choosing inserts by failure mode and route stress, then locking geometry, tolerance, and pack-out in the spec. Send your bottle data, and I will engineer the tray.
Get a Custom Gift Box Insert Plan
About Me
About JINYI
Brand: Jinyi
Slogan: From Film to Finished—Done Right.
Website: https://jinyipackage.com/
Our mission: I deliver reliable, usable, production-ready packaging so brands spend less time clarifying details and get more predictable quality, clearer lead times, and structures that match real use.
About me: JINYI is a source manufacturer specializing in custom flexible packaging solutions, with over 15 years of production experience serving food, snack, pet food, and daily consumer brands.
We operate a standardized manufacturing facility equipped with multiple gravure printing lines as well as advanced HP digital printing systems, allowing us to support both stable large-volume orders and flexible short runs with consistent quality.
From material selection to finished pouches, we focus on process control, repeatability, and real-world performance. Our goal is to help brands reduce communication costs, achieve predictable quality, and ensure packaging performs reliably on shelf, in transit, and at end use.
FAQ
1) Which insert material is best for skincare gift sets?
I choose by failure mode and route stress. Foam is soft but can loosen over time, EVA is stable but can scuff, and paperboard is efficient but needs tolerance control.
2) Why do bottles rattle even when they “fit” in the tray?
Small clearance becomes travel during vibration. I remove degrees of freedom and design anti-creep geometry, not just tightness.
3) How do inserts help reduce leaks?
Inserts can reduce torque and movement that loosens caps, and they can also isolate and contain leaks so one failure does not ruin the whole set.
4) What is the biggest risk with foam inserts?
Compression set. Foam can loosen after storage or stacking, causing rattle and a cheap feel even if nothing breaks.
5) What do you need from me to quote an insert correctly?
I need each bottle’s dimensions, weight, material and finish, closure type, set layout, shipping route, carton stack plan, and your acceptable rattle/scuff limits.