Premium skincare gift boxes often get expensive for the wrong reasons: too many parts, too much handwork, and finishes that look great once but fail at scale.
I cut cost by protecting the moments buyers actually feel. I simplify what customers do not notice, and I lock structure, insert logic, and pack-out rules so the box still looks premium on shelf and after shipping.
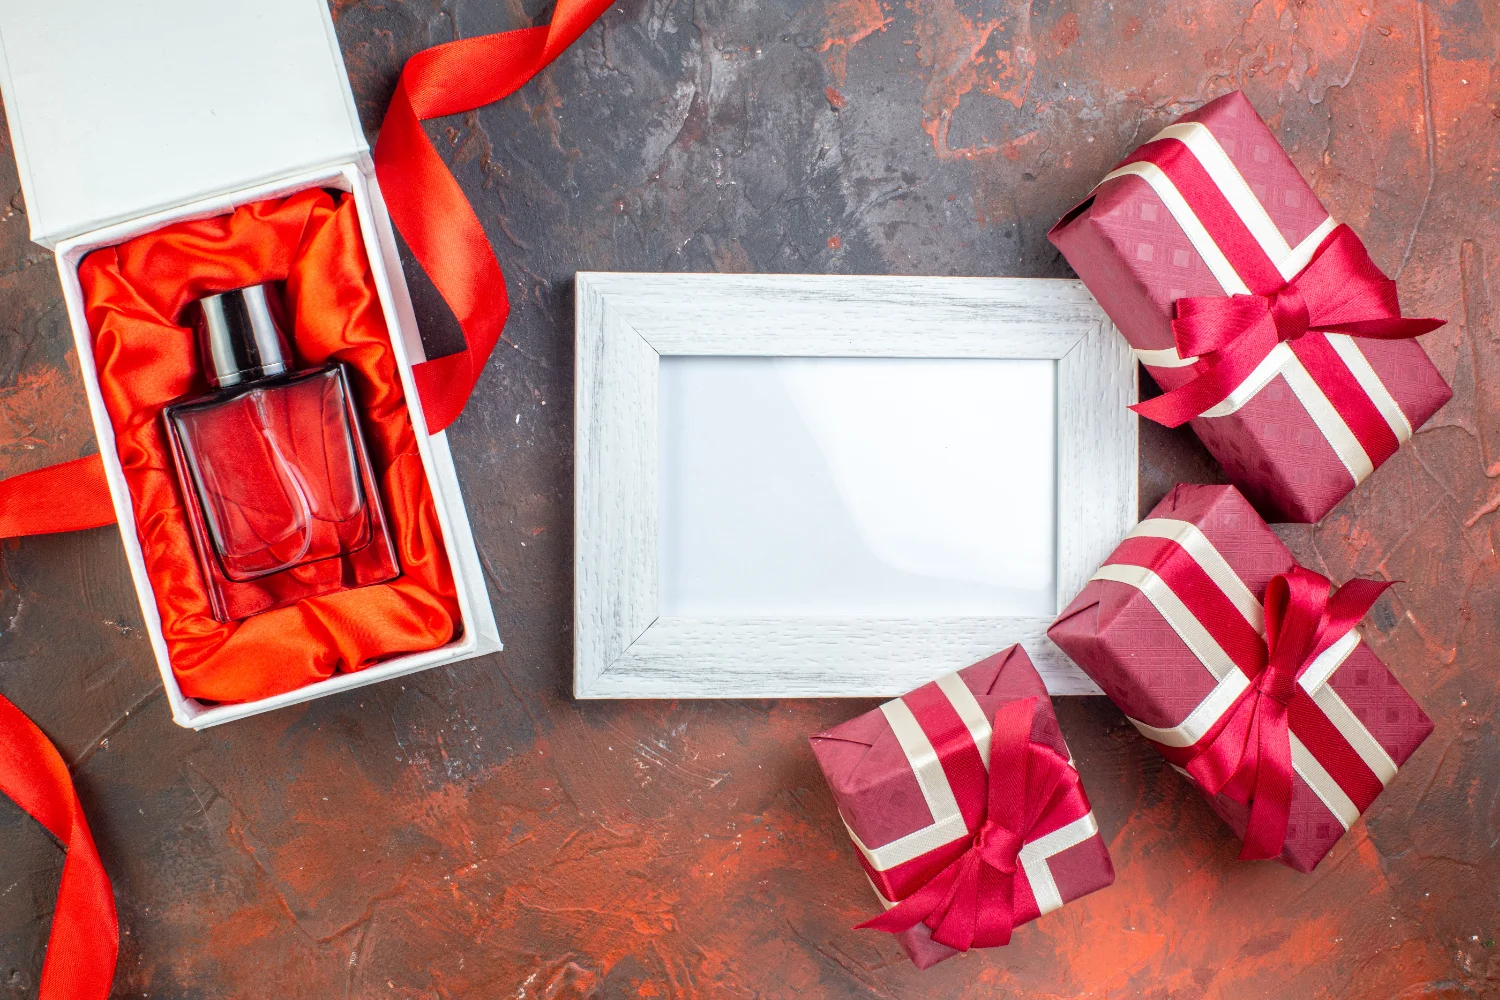
See a flip-top rigid gift box format where premium feel comes from structure, not overbuilding

When a brand asks me to “make it luxury but cheaper,” I do not start by cutting board thickness or removing finishes. I start by identifying where the premium feeling is created, then I reduce everything that only adds cost, risk, and rework.
Define “Premium” by Buyer Moments: First Touch, First Open, Product Reveal, and Re-close?
I do not define premium as heavier, thicker, or more expensive. I define premium by four buyer moments that happen in the first 10 seconds.
I focus on first touch, first open, product reveal, and re-close alignment. If these moments feel intentional, the box reads premium even with a lean build.
The four premium moments I design for
| Buyer moment |
What buyers feel |
What I control |
What I avoid spending on |
| First touch |
Surface feels “clean” and intentional |
Paper choice, texture, anti-scuff plan |
Extra thickness that adds no feel |
| First open |
Resistance, sound, smooth motion |
Hinge, stop design, closure geometry |
Complex magnets that slow assembly |
| Product reveal |
Order, symmetry, “no chaos” |
Insert layout, spacing, visual grid |
Hidden parts buyers never see |
| Re-close |
Edges align, no warp, no gap |
Board stiffness path, wrap tension, tolerances |
Extra decoration that increases rework risk |
From a production standpoint, this matters because I can reduce cost without touching the four moments. In real manufacturing, this detail often determines whether cost cuts feel like “downgrades.” From our daily packaging work, we see brands overbuild the wrong areas, like adding thick board and multiple finishes, while ignoring hinge stability and re-close alignment. Buyers do not measure board caliper. Buyers feel the first touch and they notice alignment. I therefore keep budget in the places that create the premium story, and I remove budget from hidden complexity that only raises labor time and defect risk.
Start With a Cost Map: Where the Money Really Goes (Board, Wrap, Finish, Magnet, Insert, Labor)?
I do not cut cost by guessing. I draw a cost map and I identify the true cost drivers.
In skincare gift boxes, the big drivers are often not raw materials. The drivers are process steps, hand labor, assembly speed, and yield loss from rework.
My cost map for skincare gift boxes
| Cost bucket |
Why it gets expensive |
My first move to cut cost |
| Board + structure |
Over-thick board, poor force path causes warp |
Optimize structure and hinge before thickness |
| Wrap + paper |
High waste, hard wrapping on corners |
Simplify wrap edges, reduce corner failure |
| Finishes |
Stacked processes, high defect rate |
Choose one hero finish, reduce interactions |
| Magnets/closures |
Extra assembly steps, alignment sensitivity |
Use geometry-first closure, reduce parts |
| Inserts |
Complex cutouts, many parts, slow packing |
Reduce parts, simplify geometry, keep stability |
| Labor + yield |
Handwork, rework loops, skill dependence |
Design for fast, foolproof assembly |
From our daily packaging work, we see that many “cheapening” attempts backfire because they ignore labor and yield. In real manufacturing, this detail often determines whether a cost-down project actually saves money. If I reduce board cost but increase rework, total cost goes up. If I remove a finish but add a slow manual step, total cost goes up. I therefore cut the highest-risk, highest-labor items first. I also lock a production-ready spec, because an unclear spec turns into trial-and-error, and trial-and-error is expensive.
Thickness Isn’t Strength: When I Reduce Board Caliper but Improve Structure and Hinge Design?
Many teams buy “safety” by adding thicker board. I still see those boxes warp, gap, or misalign because structure is wrong.
I reduce board caliper only after I stabilize the force path. I control wrap tension, hinge geometry, fold widths, and stop surfaces so the lid closes cleanly and stays aligned.
How I trade thickness for smarter structure
| Problem |
What thicker board fails to fix |
What I fix instead |
| Lid warp |
Warp still happens from wrap tension |
Balance wrap tension, improve hinge path |
| Misalignment |
Thick board still drifts if stops are weak |
Add stable stop geometry and tolerances |
| Corner crush |
Thickness does not protect bad corners |
Improve corner design and outer pack-out |
From a production standpoint, this matters because structural stability is cheaper than brute force. In real manufacturing, this detail often determines whether your box re-closes with a clean alignment line. I often drop board thickness by one level and still improve performance because the hinge becomes more stable and the wrap is more balanced. I also reduce scrap because thinner board can be easier to wrap without cracking and without corner lifting. I do not chase “the thickest board.” I chase “the most stable close.” That is what buyers notice, and that is what protects shelf impact.
The “Hidden Luxury” Rule: Spend on One Hero Detail, Simplify Everything Else?
Premium does not come from adding every effect. Premium comes from one clear design decision that feels intentional.
I keep one hero detail that carries the luxury story, and I simplify all other finishes and parts to protect yield and speed.
My hero detail strategy
| Hero detail |
Why it reads premium |
What I simplify around it |
| Clean foil logo |
High contrast, brand focus |
Reduce extra UV and heavy lamination stack |
| One strong texture paper |
Tactile premium without fragile coatings |
Remove soft-touch + complex finish interactions |
| Small spot UV accent |
Controlled shine creates depth |
Keep UV coverage limited, avoid edge zones |
From our daily packaging work, we see that brands lose premium feel when they try to “average” luxury across every surface. In real manufacturing, this detail often determines whether you suffer rework from finish fights. If I choose a hero detail, I can reduce the number of interacting processes, and that reduces defect probability. I also keep the box looking more intentional. Buyers read restraint as premium when the execution is clean. I would rather deliver one perfect hero detail than three effects that fight each other and arrive scuffed.
Insert Cost Without Downgrading: How I Simplify Geometry and Reduce Parts While Improving Stability?
Inserts are a silent cost driver. Material cost is not the whole story. Complexity cost is often bigger.
I reduce insert cost by reducing part count and simplifying cut geometry, while keeping motion control so products stay orderly and quiet in transit.
How I cut insert cost without losing stability
| Insert cost driver |
What it causes |
My cost-down move |
| Too many components |
Slow assembly and packing errors |
Combine functions into one piece |
| Complex cutouts |
Higher waste and slower cutting |
Use simpler pockets and stable stops |
| Over-tight tolerances |
Hard insertion, scuffs, rework |
Controlled clearance + anti-rattle geometry |
From a production standpoint, this matters because insert complexity hits you twice: it increases cost and it increases complaints. In real manufacturing, this detail often determines whether packing is consistent across shifts. I design inserts to be “foolproof.” I want one motion to place the product, one motion to confirm seating, and minimal chance of wrong orientation. I also design for shipping: no bottle clash, no rattle, and stable reveal when the lid opens. Customers remember the reveal and the order. Customers do not remember that you used three foam layers. I cut the layers, keep the order, and protect the premium moment.
Finish Stack Optimization: When I Replace Soft-Touch/Foil/UV with a Cheaper Look That Reads Premium?
Some finish stacks look premium but cost too much in rework and yield loss. I do not chase the most complicated finish menu.
I choose finishes that read premium while staying stable in mass production. I often trade fragile stacks for textures, controlled gloss contrast, and simpler metallic accents.

My stable finish substitutions
| High-risk stack |
Common failure |
My stable alternative |
Why it still reads premium |
| Soft-touch + large UV + foil |
Scuff, blocking, dull foil |
Texture paper + small foil logo |
Tactile feel with low rework risk |
| Heavy spot UV coverage |
Edge lift, halos |
Controlled varnish contrast |
Premium depth without fragile borders |
| Multiple metallic effects |
Registration issues |
One metallic hero zone |
Cleaner brand focus |
From our daily packaging work, we see that “stable 90 points” beats “fragile 100 points.” In real manufacturing, this detail often determines whether you can deliver on time without rework. I would rather use a texture paper that never scuffs than a soft-touch that turns shiny in cartons. I would rather use a simple foil logo than a foil-plus-UV overlay that needs perfect registration. The premium story must survive shipping and handling, not just photography. That is how I cut cost without cutting the brand image.
Assembly Labor Is a Silent Killer: How I Design Boxes to Pack Faster with Less Skill?
Labor is often the hidden cost that destroys your budget. Complex boxes do not only cost more to make. They cost more to assemble and they fail more often.
I design for fast, low-skill assembly. I reduce steps, reduce alignment sensitivity, and reduce chances for operators to make small mistakes that create big defects.
Labor reduction rules I use
| Labor problem |
What it causes |
My design move |
| Too many manual steps |
Slow cycle time |
Remove parts and simplify closures |
| High alignment sensitivity |
Misaligned lids and gaps |
Add self-locating geometry and stops |
| Skill-dependent wrapping |
Corner defects and rework |
Use wrap-friendly edges and tolerant corners |
From a production standpoint, this matters because assembly speed and yield determine real cost. In real manufacturing, this detail often determines whether your cost per unit stays stable when volume rises. I often remove magnets or reduce magnet count when the closure can be solved by geometry and hinge stability. I also reduce ribbons and extra layers that require careful placement. When the box is easier to assemble, defects drop, and the premium look becomes more consistent. Consistency is a premium signal. A fancy finish with uneven execution is not premium. It is risky.
Pack-Out and Shipping: Why Better Carton Design Often Saves More Than Upgrading the Gift Box?
Many brands spend budget on the gift box and ignore the shipping carton. Then the gift box arrives scuffed or corner-crushed and the “premium” story collapses.
I often save more money by improving pack-out and carton design than by upgrading the box materials. If the route stress is controlled, the box does not need overbuilding.
Pack-out upgrades that reduce returns
| Pack-out issue |
What it causes |
My low-cost fix |
| Boxes rub inside cartons |
Scuffs and dulling |
Add interleaves or partitions |
| Too much free space |
Corner impacts and rattling |
Control carton fit and void fill |
| Bad stacking direction |
Warp and crush |
Lock orientation and stack limits |
From our daily packaging work, we see brands overspend on the box to compensate for weak shipping protection. In real manufacturing, this detail often determines whether premium finishes survive transit. If cartons allow rubbing, soft-touch will shine and foil will dull. If cartons allow impact, corners will crush. I fix the shipping system first, because it is often cheaper. When pack-out is stable, I can reduce box overbuilding and still protect shelf impact. That is real cost control, not fake cost cutting.
My Two-Tier Proposal: Display Tier vs Production Tier (Same Look, Different Risk Margins)?
I do not force one solution on every channel. Retail, gifting, and e-commerce face different risks.
I propose two tiers that look similar but have different risk margins. One tier maximizes impact. The other tier maximizes stability and yield.
Two-tier proposal
| Tier |
Best for |
What I keep |
What I simplify |
| Display tier |
Retail, photo-driven launch, controlled route |
One bold hero detail + strong tactile moment |
Limit finish interactions and protect pack-out |
| Production tier |
E-commerce, long shipping routes, high volume |
Same visual grid + clean brand logo |
More stable finishes, fewer steps, higher yield |
From a production standpoint, this matters because brands need options, not arguments. In real manufacturing, this detail often determines whether you can scale across channels without redesigning every season. I keep the brand look consistent between tiers, and I change the hidden risk margins. That way the buyer does not feel a downgrade, but the supply chain becomes more stable. This is how I cut cost and keep shelf impact at the same time.
Quoting Checklist: What I Need to Cut Cost Without Breaking the Premium Story?
I cannot cut cost safely without clear goals. I need to know what “premium” means for your brand and your route.
I quote by channel, unboxing goals, product risk, and acceptable protection steps. If you give me these inputs, I can cut waste instead of cutting the premium story.
My quoting checklist for cost-down without downgrade
| Input |
Why I need it |
What it changes |
| Channel (retail / gifting / e-commerce) |
Defines route stress and handling |
Finish choice and pack-out plan |
| Premium moments you care about |
Defines where to spend |
Hero detail and structure focus |
| Product weights and fragility |
Defines insert stability needs |
Insert geometry and material |
| Open/close frequency |
Defines hinge and closure durability |
Hinge design and tolerance |
| Finish sensitivity (fingerprints/scuffs) |
Defines surface system risk |
Paper/lamination selection |
| Quantity and lead time |
Defines process window and yield target |
Labor plan and spec strictness |
| Protection acceptance (bags/interleaves) |
Defines how I prevent shipping wear |
Pack-out cost vs box overbuild |
From our daily packaging work, we see the best cost-down results when the brand is clear about the premium story and the route reality. In real manufacturing, this detail often determines whether a cost-down project turns into a redesign loop. If you tell me where buyers must feel luxury, I keep those moments. If you tell me the shipping risk, I engineer protection in the cheapest place, which is often the carton system. Then I cut complexity, reduce labor, reduce rework, and protect shelf impact. That is how I deliver premium unboxing without overbuilding.
Conclusion
I cut skincare gift box cost by protecting the four premium moments, simplifying inserts and labor, and improving pack-out. If you share your channel and goals, I will build a cost-down spec that still looks premium.
Get a Cost-Down Premium Gift Box Plan
About Me
About JINYI
Brand: Jinyi
Slogan: From Film to Finished—Done Right.
Website: https://jinyipackage.com/
Our mission: I deliver reliable, usable, production-ready packaging so brands spend less time clarifying details and get more predictable quality, clearer lead times, and structures that match real use.
About me: JINYI is a source manufacturer specializing in custom flexible packaging solutions, with over 15 years of production experience serving food, snack, pet food, and daily consumer brands.
We operate a standardized manufacturing facility equipped with multiple gravure printing lines as well as advanced HP digital printing systems, allowing us to support both stable large-volume orders and flexible short runs with consistent quality.
From material selection to finished pouches, we focus on process control, repeatability, and real-world performance. Our goal is to help brands reduce communication costs, achieve predictable quality, and ensure packaging performs reliably on shelf, in transit, and at end use.
FAQ
1) How do you make a skincare gift box feel premium without making it heavier?
I focus on the buyer moments: touch, open feel, product reveal, and re-close alignment. I keep budget on those moments and cut hidden complexity.
2) What usually drives skincare gift box cost the most?
Labor and yield loss often drive cost more than materials. Too many steps and high rework rates make boxes expensive.
3) Can you reduce board thickness without increasing damage?
Yes, if structure and hinge design are improved. I stabilize the force path and closure alignment first, then I reduce caliper safely.
4) How do you cut insert cost without looking cheap?
I reduce part count and cutout complexity while keeping stable geometry. Customers notice order and stability, not hidden layers.
5) Why does pack-out matter for premium unboxing?
Pack-out controls scuffs and corner damage. Better carton design often saves more than upgrading the gift box itself.