You can run perfect seals and still get “flat coffee” complaints after shipping. A bad venting valve sticker can turn a high-barrier bag into a leaky bag.
I catch bad valves early with simple, repeatable checks. I screen incoming parts, verify one-way function, stress the bonding edge, and run micro-leak checks before I approve a full production run.

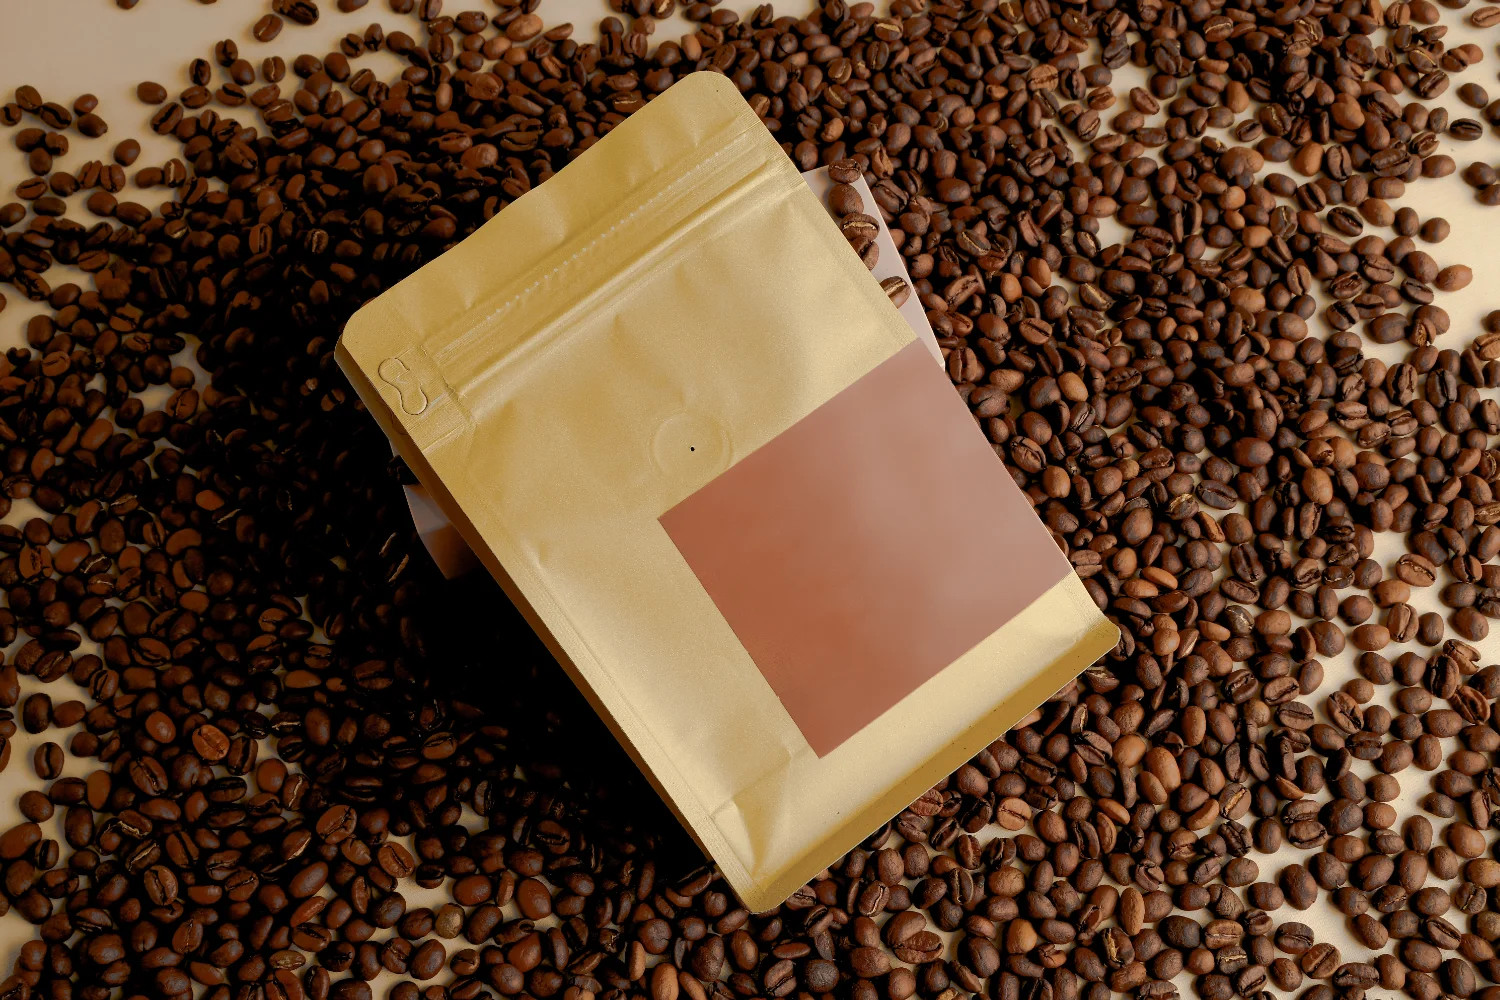
If you want a valve coffee bag spec that survives transit, I start from a proven stand-up pouch system and lock the valve zone controls:
see our coffee stand-up pouch options.
Most teams only test seal strength. I treat the valve as its own failure engine. I do not need expensive lab tools to catch most bad valves. I need a consistent routine.
Define “Bad Valve” First: What Failures Matter in Real Coffee Orders (Leak, No Vent, Sticker Lift, or Scuff)?
A “bad valve” is not just one defect. It can fail by leaking, by not venting, by lifting at the sticker edge, or by getting scuffed until it becomes a leak point.
I define the failure I want to prevent first. Then I choose the simplest checks that expose that failure before mass production.
My first step is naming the failure mode, not guessing the fix
I do not treat “valves look the same” as a pass. I define what “bad” means for the order. From a production standpoint, this matters because each failure mode needs a different check. In real manufacturing, this detail often determines whether you waste time on meaningless tests. From our daily packaging work, we see four common complaint paths. The first is micro-leaks around the valve edge that slowly flatten the bag and dull aroma. The second is no venting, which drives puffing and top-zone stress. The third is sticker edge lift, which starts as an appearance issue and ends as a leak. The fourth is scuff damage, where the valve becomes the carton’s first contact point and gets abraded. Once I pick the main risk, I build a short test routine that makes that risk visible fast.
| Failure mode |
What you see |
What I test first |
| Micro-leak at valve edge |
Flat bags, aroma fades early |
Leak screening focused on valve edge |
| No venting |
Puffed bags, unstable cartons |
One-way function check |
| Sticker edge lift |
Peeling corners, wrinkles, scuff lines |
Bonding stability + edge-lift probe |
| Scuff-to-leak |
Scratched sticker, print scuffs, later leaks |
Carton rub simulation |
Incoming Inspection: The 60-Second Visual + Touch Check I Do Before Any Lab Test?
I do not start with machines. I start with my eyes and hands. This fast screening removes obvious bad batches before I spend time on deeper checks.
I look for off-center parts, bubbles, wrinkles, uneven adhesive, and abnormal thickness that can create pressure shadows and scuff hotspots.
The quick screen that catches low-level defects early
I always begin with a fast incoming inspection. From a production standpoint, this matters because the easiest defects to catch are also the cheapest defects to fix. In real manufacturing, this detail often determines whether you stop a bad batch at the door or discover it after you have produced thousands of bags. From our daily packaging work, we see common issues like sticker edge burrs, trapped air, wrinkles, and inconsistent adhesive coating. I also check the valve body height by touch because overly tall valves get punished in cartons. I run the same 60-second routine every time so my team does not rely on “feelings.” If a batch fails this screen, I isolate it immediately and I do not let it reach the line.
| Quick check |
What I look for |
Why it matters |
| Visual alignment |
Off-center parts, uneven shape |
Creates stress and bonding gaps |
| Edge quality |
Burrs, rough edges, lifted corners |
Starts peel and scuff damage |
| Surface defects |
Bubbles, wrinkles, contamination |
Becomes leak channels under stress |
| Adhesive feel |
Dry spots, uneven tack, smear |
Predicts edge lift after humidity |
One-Way Function Check: How I Verify Venting Works Without Over-Engineering?
I only need to prove three things: the valve vents, it does not backflow, and it behaves consistently across samples.
I keep the method simple and repeatable. I do not chase perfect numbers. I chase clear pass/fail behavior and batch-to-batch stability.
Simple actions, consistent observations, fast decisions
I do not turn a one-way valve check into a research project. From a production standpoint, this matters because you need a routine your team can run daily without special tools. In real manufacturing, this detail often determines whether you catch “dead valves” before you produce puffed bags. From our daily packaging work, we see that the most dangerous valves are not the ones that fail obviously. The most dangerous valves are the ones that behave inconsistently across a batch. So I use a fixed procedure. I apply the same pressure action, I repeat it a set number of times, and I compare multiple samples from different packs. I look for signs of venting response and I check for backflow behavior. If the response varies widely, I treat it as a risk even if one sample looks fine.
| What I verify |
What “bad” looks like |
What I do next |
| Venting |
No response or delayed response |
Reject or quarantine batch |
| No backflow |
Air movement in reverse direction |
Escalate for supplier investigation |
| Consistency |
Some work, some do not |
Increase sampling, do stress checks |
Bonding Stability Check: Why “Sticks Today” Can Lift After Heat, Humidity, or Carton Rub?
Most valve failures start as bonding failures. Edge lift begins small, then it turns into scuffing and micro-leak channels after shipping.
I use low-cost stress exposures to reveal adhesive and surface mismatch early. I do not wait for a customer complaint to learn the hard way.
Edge lift is not cosmetic, it is the start of a leak path
I treat bonding stability as a core requirement. From a production standpoint, this matters because a valve sticker is a hard point with an edge. In real manufacturing, this detail often determines whether the valve zone becomes the first damage point in cartons. From our daily packaging work, we see that “it sticks today” often fails after humidity, heat, or rubbing. So I do three simple exposures. I probe the edge lightly to see if it wants to lift. I expose samples to a basic warm and humid condition and I probe again. I then simulate bag-to-bag rubbing in a carton and look for edge lift or wrinkling. These are cheap checks, but they predict expensive failures.
| Cheap bonding stress |
What it reveals |
Fail signal |
| Edge probe |
Adhesive weakness at corners |
Corner lifts with light effort |
| Warm/humid exposure |
Adhesive drift and surface mismatch |
New lift after exposure |
| Carton rub simulation |
Edge damage and wrinkle initiation |
Edge becomes a “scraper” |
Micro-Leak Catchers: The Two Simple Leak Checks That Find Valve-Edge Channels Early?
Barrier specs do not matter if valve-edge channels exist. A micro-leak can erase the benefit of a premium film structure.
I use simple leak catchers that focus on the valve edge. I do not rely on seal strength tests alone because leaks often come from channels, not low peel force.
I test the valve edge like it is a seal
I always assume the valve edge can become a leak path. From a production standpoint, this matters because valve-zone micro-leaks are often invisible and delayed. In real manufacturing, this detail often determines whether your coffee arrives dull even when the bag looks intact. From our daily packaging work, we see two simple approaches catch most valve-edge problems early. One is a dye-based leak screening that helps locate channels around the valve edge. The other is a simplified airtightness concept where I look for “does it leak or not” under a consistent setup, instead of chasing perfect lab numbers. I stress one point every time: do not only test top seals. Focus on the valve edge because that is where high-barrier systems can be defeated by a single channel.
| Leak check |
What it catches |
What I watch |
| Dye screening |
Micro-channels at valve edge |
Path location and repeatability |
| Simplified airtightness check |
“Leaks vs no leaks” fast |
Batch differences and drift after stress |
Placement Sanity Check: How I Ensure the Valve Sticker Is Not Sitting on a Fold Line, Seal Edge, or Pressure Shadow?
A good valve can still fail if it is placed in a bad zone. Fold lines, seal edges, and pressure shadows can create channels and fatigue cracks around the sticker.
I use a simple “no-go zone” checklist. If placement violates the checklist, I change placement before I approve any mass production.
Placement is part of testing because placement creates failure
I do not separate valve testing from valve placement. From a production standpoint, this matters because the pouch panel is not stressed evenly. In real manufacturing, this detail often determines whether the valve sits on a bending line and gets punished every time the bag flexes. From our daily packaging work, we see that valves placed near the top seal zone or on fold lines tend to show channels and fatigue faster. I use a “no-go list” that blocks common mistakes. I do not place valves across fold lines. I do not place valves too close to seal edges. I do not place valves where zippers or gussets create pressure shadows. I also avoid placing valves where they become the carton’s highest protrusion.
| No-go zone |
Why it is risky |
My fix |
| Fold line |
Bending amplifies edge channels |
Move to a flatter panel zone |
| Near seal edge |
Seal sensitivity plus hard point |
Keep a safe spacing margin |
| Pressure shadow area |
Uneven pressure creates channels |
Re-layout features and valve zone |
Scuff and Protrusion Check: How I Predict Whether the Valve Will Get Destroyed in Cartons?
Valve scuffing is not cosmetic. It leads to edge lift, print damage, and micro-leaks. I predict scuff risk by simulating carton behavior.
I pack sample bags as the real order will ship. I then simulate sliding and rubbing to see if the valve becomes the first contact point and gets punished.
Cartons do not ship gently, so I test like a carton
I test scuff risk with a simple carton simulation. From a production standpoint, this matters because cartons create repeated rubbing and sliding under vibration. In real manufacturing, this detail often determines whether a valve sticker edge lifts and becomes a leak point later. From our daily packaging work, we see that protrusion is a predictor. If the valve is the highest point, it will be the first point to rub. I also treat COF as part of the valve test because surface friction changes how bags slide against each other. If the surface is too slippery, bags slide more and rub more. If the surface is too grippy, bags drag and tear at edges. I want a friction behavior that does not turn the valve into a wear target.
| What I simulate |
What I watch |
Pass signal |
| Real pack-out |
Valve is contact point or not |
Valve is protected in carton geometry |
| Sliding/rubbing |
Edge lift and scuff marks |
No lift, no aggressive abrasion |
| COF behavior |
Over-slip or over-grip |
Stable handling and stable surface |
Batch Consistency Check: Why One Good Sample Means Nothing Without a Simple Sampling Rule?
A few good samples can hide a bad batch. I use a basic sampling rule to catch batch variation before it becomes a full-scale complaint.
I sample across different boxes, different rolls, and different time windows. I care about the worst acceptable sample, not the best-looking sample.
I approve batches by variation control, not by one perfect piece
I never approve a valve batch from one sample. From a production standpoint, this matters because batch variation is the real enemy of mass production. In real manufacturing, this detail often determines whether you get “random” failures that are actually systematic. From our daily packaging work, we see that suppliers can have drift across runs, and drift can also appear inside the same shipment. So I take samples from multiple packs and I repeat the same checks. I look for consistency in venting response, bonding edge behavior, and leak screening results. If variation is high, I treat the batch as a risk even if some pieces look good. I would rather slow down and correct the supply chain than gamble with a full container of coffee bags.
| Sampling rule |
What it prevents |
My decision trigger |
| Different boxes |
“Good top layer” bias |
Any box fails = quarantine |
| Different time windows |
Production drift |
Trend shift = investigate |
| Minimum set size |
False confidence |
Worst-case must still pass |
My Go/No-Go Criteria: The Minimum Pass Lines I Lock Before I Approve Mass Production?
I do not approve mass production with vague language. I lock clear pass lines that my team can enforce and suppliers must respect.
My minimum lines cover one-way function, bonding stability, micro-leaks, scuff durability, and placement rules. If any line fails, the batch does not go to production.
My pass lines are simple because they must be enforced
I always write clear go/no-go criteria. From a production standpoint, this matters because unclear standards cause inconsistent decisions under pressure. In real manufacturing, this detail often determines whether a team ships risk because “it looks okay.” From our daily packaging work, we see that the best standard is one that a team can run and enforce on a busy schedule. So I lock minimum lines: one-way function must be consistent, sticker edges must not lift, micro-leak screens must pass, scuff simulation must not create edge damage, and placement must follow no-go rules. I do not approve a batch that only “passes on average.” I approve a batch that stays safe at the edge of normal variation.
| Pass line |
Why it exists |
What I do if it fails |
| Consistent vent + no backflow |
Prevents puffing and oxygen shortcut |
Stop batch, escalate supplier |
| No edge lift after stress |
Prevents scuff-to-leak path |
Change adhesive/surface pairing |
| No leak signals at valve edge |
Protects freshness and shelf life |
Rework bonding process or parts |
| Carton rub durability |
Prevents transit damage |
Adjust COF, pack-out, placement |
Validation Plan Lite: The Cheapest “Combo Stress” I Run to Mimic Real Shipping Without a Full Lab?
I prefer combo stress over expensive single tests. Real shipping stacks vibration, compression, humidity, and rubbing all together.
I run a simple combo sequence and then re-check leaks and edge lift. If the valve survives this sequence, I trust it much more in mass production.
Combo stress is the closest cheap predictor of real complaints
I use a low-cost combo stress routine because shipping is never a single force. From a production standpoint, this matters because isolated tests can miss the interaction that creates failure. In real manufacturing, this detail often determines whether you discover a valve-edge channel only after the coffee ships. From our daily packaging work, we see that vibration creates sliding, sliding creates scuff, scuff creates edge lift, and edge lift becomes a leak path. Compression adds shear to the top zone. Humidity can soften adhesives and amplify edge lift. So I apply a simple sequence: rubbing or sliding simulation, compression simulation, and a warm/humid exposure. After that, I repeat the micro-leak screening and I probe the sticker edge again. If the valve passes after combo stress, I have much higher confidence in approving a full run.
| Combo stress step |
What it imitates |
What I re-check |
| Rub / sliding |
Carton vibration scuff |
Edge lift and surface damage |
| Compression |
Pallet stacking load |
Valve edge channels |
| Warm / humid exposure |
Warehouse and route climate |
Bond drift and leak signals |
| Leak re-check |
Delayed failure reveal |
Pass/fail after stress |
If you want me to turn this routine into a valve-zone spec and a production checklist for your next run, start here:
build your coffee pouch baseline with us.

Conclusion
I do not approve valves by appearance. I approve them by one-way behavior, edge stability, micro-leak screening, and combo stress. If you want fewer complaints, contact me.
Get a Coffee Valve Bag Spec + Pre-Run Testing Checklist
My Role
About Me
Brand: Jinyi
Slogan: From Film to Finished—Done Right.
Website: https://jinyipackage.com/
Our mission:
JINYI is a source manufacturer specializing in flexible packaging. I want to deliver packaging solutions that are reliable, practical, and easy to execute for brands. I focus on predictable quality, clear lead times, and structures that match the product and printing goals.
About me:
JINYI is a source manufacturer specializing in custom flexible packaging solutions, with over 15 years of production experience serving food, snack, pet food, and daily consumer brands.
We operate a standardized manufacturing facility equipped with multiple gravure printing lines as well as advanced HP digital printing systems, allowing us to support both stable large-volume orders and flexible short runs with consistent quality.
From material selection to finished pouches, we focus on process control, repeatability, and real-world performance. Our goal is to help brands reduce communication costs, achieve predictable quality, and ensure packaging performs reliably on shelf, in transit, and at end use.
FAQ
1) Do I need lab equipment to test coffee vent valves?
No. I catch most bad valves with consistent incoming screening, one-way checks, bonding stress exposure, and simple micro-leak screening.
2) What is the most common valve-related failure in shipping?
I see sticker edge lift and valve-edge micro-channels most often. They start small and become leaks after rubbing, compression, and humidity.
3) Can a good film structure still fail because of the valve?
Yes. A micro-leak at the valve edge can bypass barrier performance and flatten the bag, which accelerates aroma loss.
4) What should I sample to avoid “good sample bias”?
I sample across different boxes, different time windows, and I repeat the same checks. I approve based on worst-case acceptable behavior.
5) What should I lock in the spec before mass production?
I lock one-way function consistency, bonding edge stability after stress, micro-leak pass results, and safe placement away from folds and seal edges.